Thursday, January 24, 2013

Love Bugs, Grand Opening, Art Shows, and More!


Love Bugs, Grand Opening, Art Shows and More!


Winter Classes are in full swing here at the studio and we're so excited to see so many new and returning students. A busy studio is a happy studio!

Our Pooler studio Grand Opening is approaching and we decided to combine the Opening with a Art Show. Love Bugs is our theme and we'll be transforming the studio into a exotic garden. A ribbon cutting ceremony, refreshments, Valentine crafts, and surprises are all part of the fun!

Here's how to make your own love bugs at home!


Love Bugs Projects

This is a fun, easy painting project! My only requirement was that the bugs were bright and colorful. I had everyone draw their bugs extra big to make painting easier and to ensure they did not lose their shape or any details.


Materials:

Love bug drawing sheet (although feel free to create your own style of bug)
practice paper
pencil
Bristol paper
paints
brushes


Step One

Start by practicing drawing the love bugs. Some students wanted to create their own which was great!


Step Two

Pick your favorite love bug and redraw, using the whole piece of paper. Outline in black crayon.
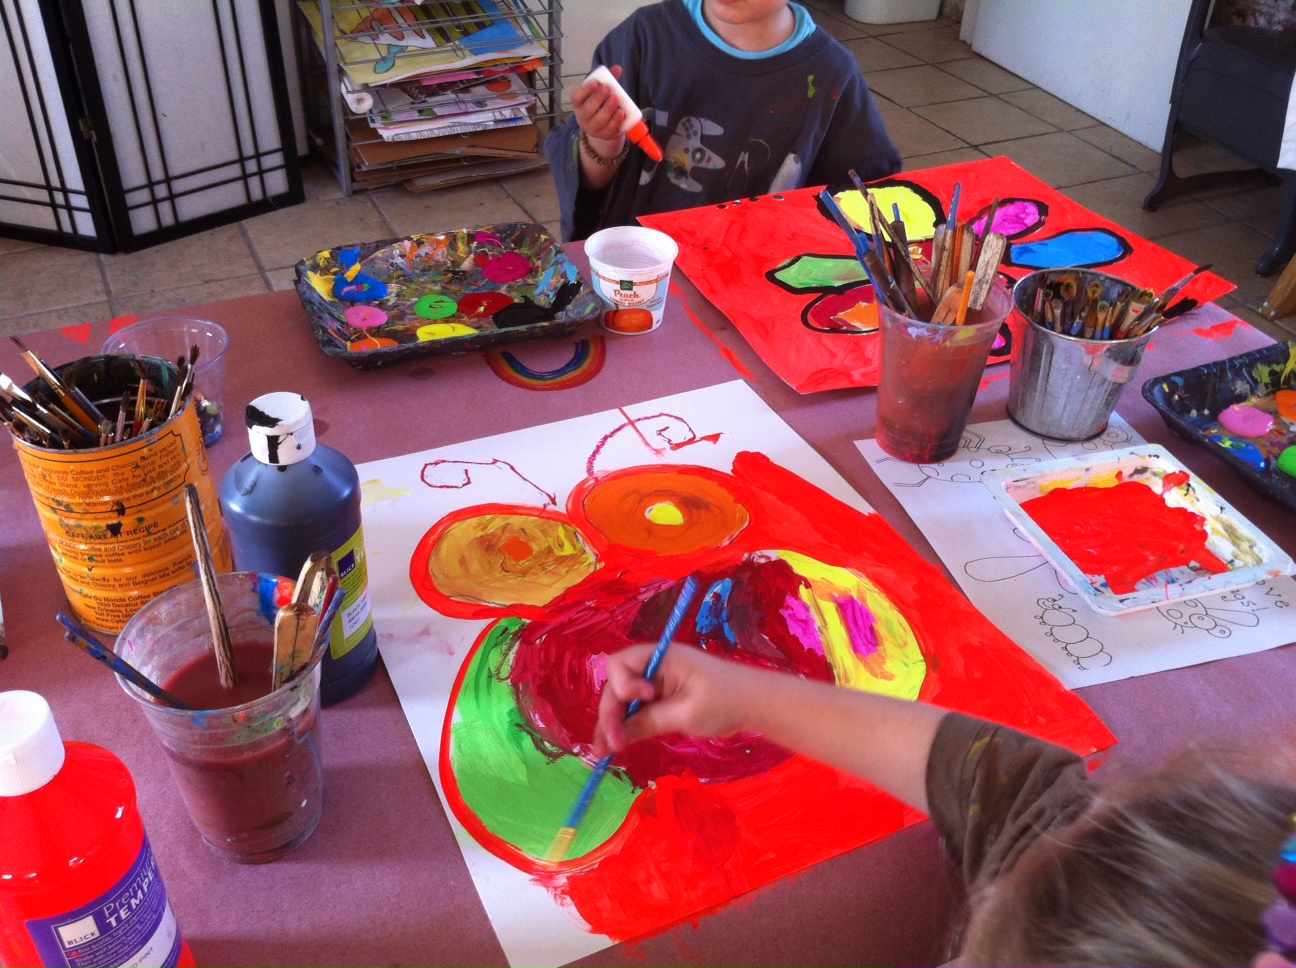


Step Three

Paint love bug and background using lots of bright, jewel like color. Finish by outlining with black paint using a small brush.


Love Bugs!


Sunday, December 23, 2012

Christmas Artwork Highlights!

Christmas Artwork Highlights!

 
Here are a few highlights of the Christmas inspired artwork our talented students created over the month! Have a Happy and Safe Holiday and we'll see you in the New Year! XO!


Wednesday, December 19, 2012

Crazy Reindeer Project!

Crazy Reindeer Project!

This fun holiday project was developed by Jane, a wonderful artist and teacher! Jane did this project with her drawing class and I liked it so much I used it too! This project works best for ages 6+.

Materials:
Reindeer Drawing Sheet
practice paper
pencil
Bristol paper
black crayon (or any color crayon)
white oil pastel
blue paint (thinned with water)
brown paint
dark brown paint
red paint
black paint
brushes
scrap paper
scissors
glue

Step One
Using the drawing sheet as a guide, practice drawing your reindeer. Pay close attention to how the shapes create a reindeer silhouette!


Step Two
Re-draw reindeer on Bristol paper and outline with crayon. Next, using a white oil pastel make white dots (snowflakes) all over the background. Paint over background with thinned blue acrylic paint (snowflakes should show through).


Step Three
Paint your reindeer! Brown paint for the chest, head, and ear. Dark brown for the antlers. Red for the nose and blue or dark brown for the eye. Time to outline! Outlining is great for bringing back features that might have gotten lost while painting. Outline using black paint on a small brush, older kids should practice using only the tip of the brush for a finer line!


Step Four
Decorate the antlers with cut paper ornaments! Voila! Crazy Reindeer is finished!


Friday, December 7, 2012

A little Holiday Cheer!

Here's a fun holiday project for the season! I've done this project with a few of my students and thought it'd make a good one to try at home! It involves drawing a elf made out of shapes. It works best with ages 5+. Enjoy!


Materials:

*Elf Drawing Sheet

*Practice Paper

*Pencil

*Bristol Paper

*Black Crayon

*Paint

*Brushes


Step One:

Practice drawing the elf using the Drawing Sheet. Explain that the face is made up entirely of shapes!


Step Two:

After practice drawing is finished it's time to re-draw on Bristol paper. Once finished, go over pencil lines with black crayon (or any color crayon). Creating a thicker line helps when painting!


Step Three:

Paint your Elf! Outline Elf in black paint with small brush to help bring back any features that might have gotten lost!


Step Four:

Decorate using scrap fabric and buttons! Create a hat, clothes, whatever!


Friday, November 30, 2012


 Drawing Games!


Recently I've been thinking a lot about the problem solving aspect of art. All art is problem solving to a degree (which is why it's so unfortunate that art is often vulnerable when it comes to budget cuts) and the reason it's so important to developing minds! In a world of instant gratification it's become even more crucial a skill to practice.  I make a effort to include as many problem solving  projects as possible at the studio. Some  favorites of mine and one that is easy to do at home, in the car, whenever are..... Drawing Games! The beauty of a drawing game is that you don't need special materials or even the ability to draw well. Simple imagery and stick figures work fine! Here are a couple of fun drawing games for the next time your child is bored at home, in the car, or at a restaurant!


Drawing An Adjective! (ages 5+)

I learned long ago that if you can add an element of chance to any game it's instantly more fun! That's why any time we can pull folded paper from a cup, we do (however, it's not necessary). Here's how you play,


Materials:

empty cup of any shape or size

paper (computer paper folded in half works fine, it'll give you four spaces to draw on so you don't end up wasting paper)

pencils

scissors


Cut small paper slips and clearly print adjectives on them (hot, cold, tired, heavy, smelly, and so on) then fold and place in cup.

Next pull a piece of paper from the cup. Once you have your adjective it's time to draw the word (if playing with kids that can read it's fun to keep words a secret to guess once finished)

Here are some examples of adjectives and drawings!


Tiny


Hot


 Smelly ( a lot of kids had the same idea about this one!)


Wooden


An Animal's Perspective!


Materials:

Pencils

Paper


In this game you simply draw something from an animals perspective (bugs can be included). This game can be slightly more difficult but children as young as six did wonderfully at it. Here are some examples!


Bee


Bird (note the feet and birdhouses)


Ant

 
ENJOY!