Wednesday, December 18, 2013

Giraffe Ornament!


Nothing quite gets me like a child's drawing. The Giraffe ornament is a cute addition to any tree but it's also about preserving the adorably unique quality of a child's drawing! This week I had my student Silas helping me out. Enjoy!!


Materials:

Giraffe drawing sheet

Pencil

Yellow and Orange Construction Paper

Black Marker or Sharpie

Scissors

Glue

Ribbon

Sequins (optional)


Step One:

Draw Giraffe directly onto the yellow construction paper and cut out.


Step Two:

Draw circles onto orange construction paper and cut out. Glue onto Giraffe body.


Step Three:

Cut out small strip of orange construction paper and cut a fringe into one side to create a mane. Draw and cut out a tail. Glue down.


Step Four:

Cut out antler (use small sequins for circle on top if desired). Attach ribbon loop to back of Giraffe. Hang on tree!


Thursday, December 12, 2013

Beautiful Baubles!


I've been lucky enough to inherit my grandmother's beautiful vintage Christmas ornaments! I look forward to pulling them out every year and delight in their colors and shape. My second handmade ornament pulls inspiration from these wonderful objects (but are a lot less easy to break)!


Vintage Inspired Felt Ornaments!


Materials:
Ornament Template
Assorted Felt or other Fabric scraps
Scissors
Glue
Various Ribbon and Trim
Sequins

Step One:

Print and cut out ornament templates. Choose felt or fabric and place template on top to trace around. This will be the main body of your ornament.


Step Two:

Cut out template smaller shapes, place on top of felt or fabric and trace. Cut out smaller shapes and layer. Glue down using hot glue, tacky glue, or needle and thread.


Step Three:

Add ribbon, sequins, or any other embellishments. Add loop onto back of ornament. Hang on tree!


Wednesday, December 4, 2013

Tis the Season to Create "Russian Dolls"


The Holiday Season is here! Each year at Scribble we create several different ornaments for events, classes, and decoration. This year we will share a homemade ornament idea/template a week! Our first ornament draws inspiration from my favorite project of the year, "Russian Dolls"!


Each year it seems that there's one project that is flawless for all ages. A project that has the perfect balance of creativity and skill. This year it was the "Russian Doll" project, introduced by our talented instructor Charlotte Oden.


The artwork was so successful we used them as the theme for our annual show at Foxy Loxy Print Gallery & CafĂ©.


Here are a few of my favorite Russian Dolls!


Follow this link to our friends at Paprika Southern for step by step instructions on how to create your own "Russian Doll" ornament!


Thursday, November 21, 2013

Children's Book Festival 2013


Each November the City of Savannah and Live Oaks Public Libraries presents Savannah Children's Book Festival. It is a WONDERFUL event full of fantastic authors, illustrators, and other activities designed for children. We have had the pleasure of participating the last three years!


A few of this year's featured authors and illustrators were:


*Nick Bruel, "Bad Kitty" & "Bad Kitty School Daze"


*Marc Brown, "Arthur's Teacher Trouble" & "Arthur's Nose"


*Rachel Renee Russell, "Dork Diaries"


Tad Hills, "How Rocket Learned to Read" & "Duck and Goose"


Each Spring the library holds a poster contest with a new theme for the upcoming festival. Like many art teachers I love a good contest! Our talented students have created some truly great pieces and consistently earn awards! Here are some past entries along with tips for what makes a successful illustration at any age!


*Brainstorm! Start by coming up with at least out 4-5 ideas or concepts. Your first idea is rarely the best and it's a good way to work on problem solving skills.


*Thumbnails! Always use thumbnails. Thumbnails are simplistic mini sketches that shouldn't take more than a minute or two. Thumbnail sketches allow you to quickly work out a few options without getting too detailed.


*Composition! Kids tend to make their drawing small to medium sized and in the middle of the page. An illustration can be totally transformed by enlarging the image or changing the symmetry.


*Execution! When executing artwork consider age, materials, and size. Materials like pastels and acrylic paint do not work well with small scaled works. Watered down acrylics and Sharpie pen are a good way to preserve a beautiful drawing, especially for young artists. Colored pencils can look thin unless layered. Use colored or toned paper to punch up a colored pencil piece.


Tuesday, November 12, 2013

Bunny Portraits!!


I'm a sucker for Animal Portraits of any kind! It had been a while since we'd done them at the studio, so this week we painted Bunny Portraits. I did these with my 4-6 year olds, but would work for slightly older ages as well!


Materials:


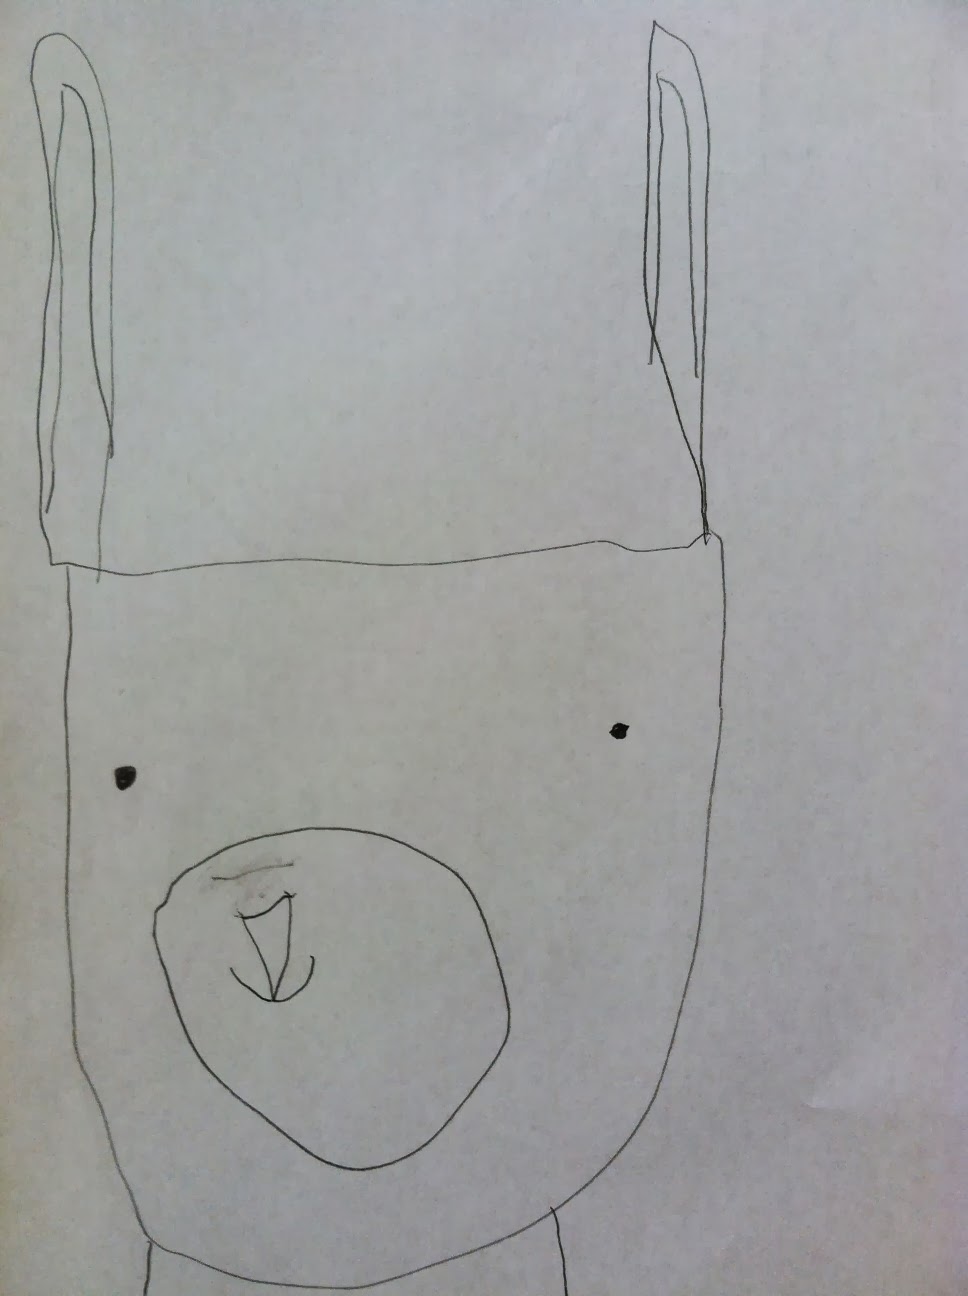
Bunny Sample Drawing
Practice Paper
Pencils
Bristol Paper
Black Crayon
Brown, Cream, Red, and Black Acrylic Paint
Paint Brushes
Glue
Scissors
Scrap fabric or other embellishments


Step One:

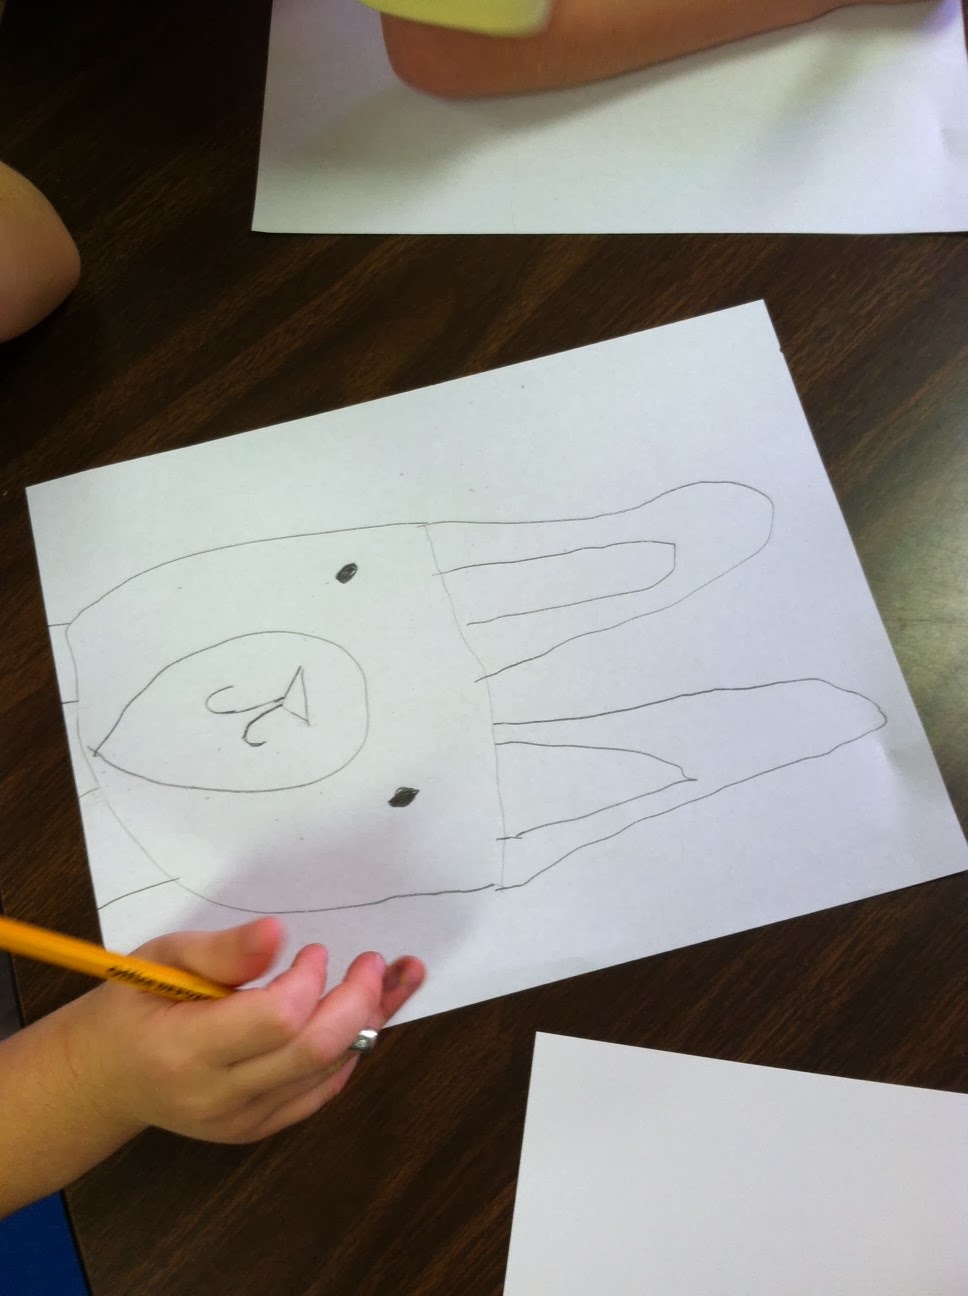
Bunny Practice Drawing!
I started out by explaining that placement is very important while drawing bunnies since it's necessary to leave room for the ears. With this in mind we drew a large U shape on our page, leaving room at the top. Next we closed in the U shape and added long ears, then the face and neck.


Step Two:

Time to Paint!
Once we finished our practice drawings, we redrew our Bunnies on Bristol paper and outlined with black crayon. Next we painted the outside of the ears, face, and neck with brown paint. The inside of the ears and circle with nose and mouth are painted with a cream color and background with red. *Outlining the bunny head with paint, then filling in the background is a good way to avoid having little ones paint on their bunnies!


Step Three:

Outline!
Lastly, we took a small brush and outlined our bunnies and their faces with black paint. Add any embellishments or fabric to finish the portraits!!