Wednesday, May 22, 2013

Spring In Review!


Spring Classes are ending this week and we're gearing up for summer. It's bittersweet as we won't see some of our students back until fall, but have loved and enjoyed our time together. As always, we've been blown away by the beautiful and imaginative work created at the studio. Here's a little review of this Spring's favorite projects! (Please feel free to email me for any instructions on the following lessons, info@thescribbleartstudio.com)


Beautiful Jellyfish


Princess Self Portrait


Get Em Batman


Gnomes in the Garden


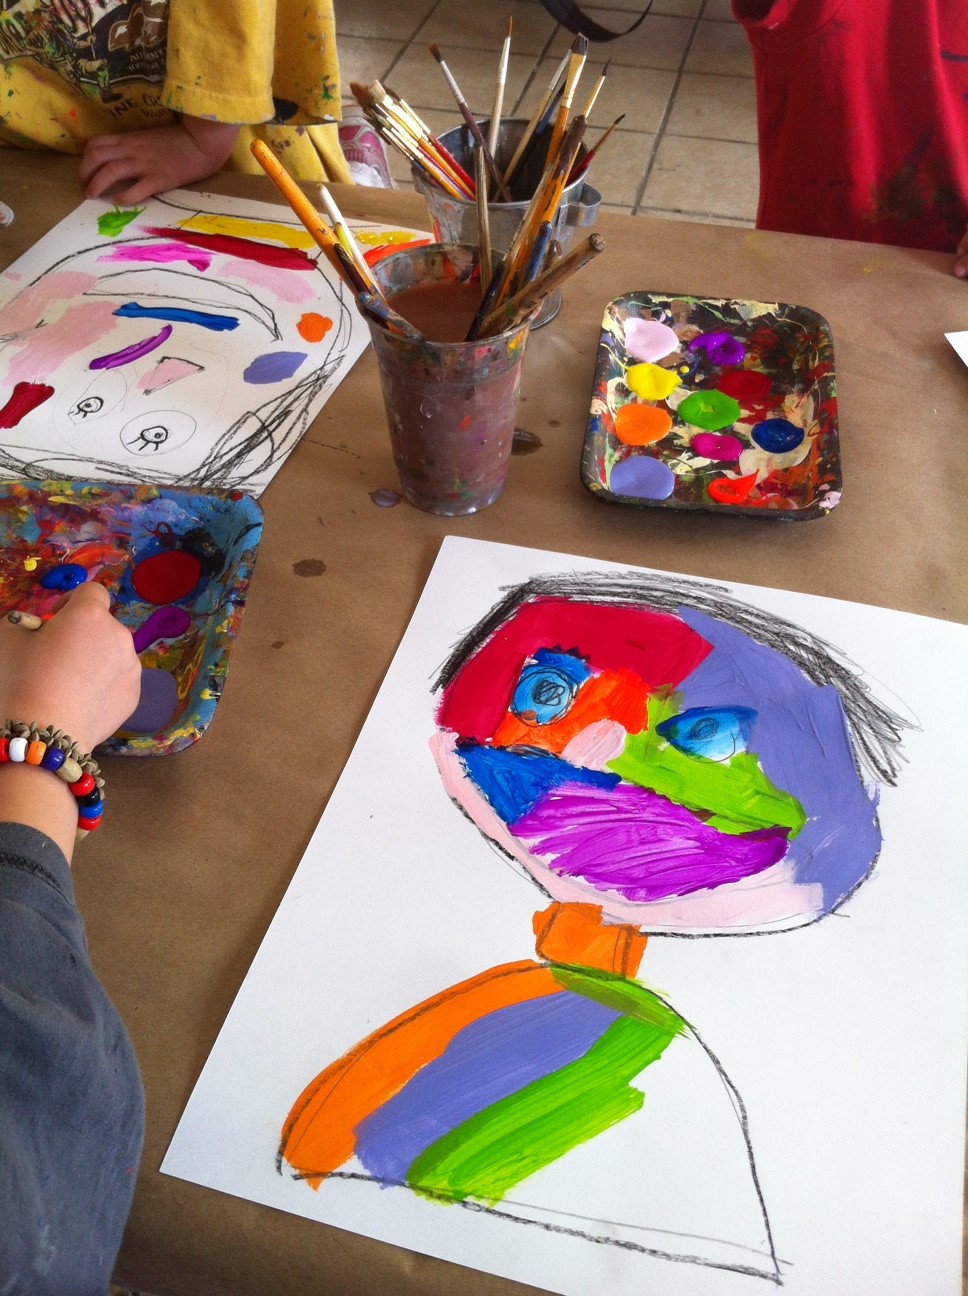
Expressive Portraits


Mama and Baby Giraffe


Frida Portrait


Sea Creatures in the Window


 Circus Collage

Wednesday, May 8, 2013

Messy Teddys!


This is a fun project to do with younger kids. It's mainly a painting project with a funny twist at the end! I did this project with my Mommy and Me and Folk Art class (ages 3-6).


Materials,

Practice Paper

Pencils

Bristol Paper

Black Crayon

White, Light Blue, Yellow, Black, Pink and Black Acrylic Paint

Brushes

Pink and Brown Construction Paper

Scissors

Glue

Buttons

Fabric for dressing bear (optional)


Step One

Practice Drawing Your Teddy!

Practice drawing a teddy bear made out of circles. Circle for the head, circle for the body, and circles to make up the face, ears, paws, legs and tail. The simpler the better!


Step Two

Paint Your Teddy!

Draw teddy bear on Bristol paper and outline in black crayon. Next paint the bear a light blue and the background yellow. Make sure your teddy is dry (use a hair dryer if necessary) and paint a large white circle on the face and little white circles in the paws, ears, tail, and legs. Using black paint, put a nose in the white circle on the face and outline your bear, pulling out the shapes if they got lost during the painting process. Add buttons for eyes.


Step Three

Treat Your Teddy to Ice Cream!

Draw a circle on pink construction paper and a triangle on brown construction paper. Cut out and glue the pink circle on top of the brown triangle in your teddy's hand, creating an ice cream cone.


Step Four

Get Your Teddy Messy!

Now for the fun part! Get your teddy messy by using the pink paint to create drips and splatters, the messier the better!


Wednesday, May 1, 2013

Expressive Self Portraits!


I love expressive painting! Sadly, as an artist I wasn't exposed to expressive painters until I was in college. As a result I try to teach as many expressive projects as I can!


This week I did Expressive Self Portraits with some of my younger and older students. I like this project because unlike most projects we do, there aren't a lot of guidelines. You just draw your face and paint. The only guideline I gave was to keep your colors fresh and try to avoid over mixing. Enjoy!


Materials:

Practice Paper
Pencil
Little or Handheld Mirror (optional)
Bristol Paper
Black Crayon
Various color Acrylic Paints
Brushes

Step 1

Start by drawing your face. I went over simple facial features and placement with my younger students. I had my older students look into a mirror while practice drawing their faces.


Step 2

Draw your head and shoulders on Bristol Paper, making sure to take up most of the page. Outline in black crayon. Paint using a variety of bright colors. I left traditional colors (peach, brown, and cream) off the palette.