

Preparing projects can sometimes feel like reinventing the wheel! It's a challenge to make the same materials and themes fresh week after week. My concept for this project was simply that I wanted to use cardboard to create a stamp. The end result was a super fun project with beautiful mixed media lions. Enjoy!
Materials:
Small Cardboard Squares
Yarn
Tape
Pencils
Practice Paper
Bristol
Black, Yellow, and Pink Oil Pastel
Brown, Yellow, and Orange Acrylic Paint
Paintbrush
Scraps of Yellow, Orange, or Brown Fabric
Step One:
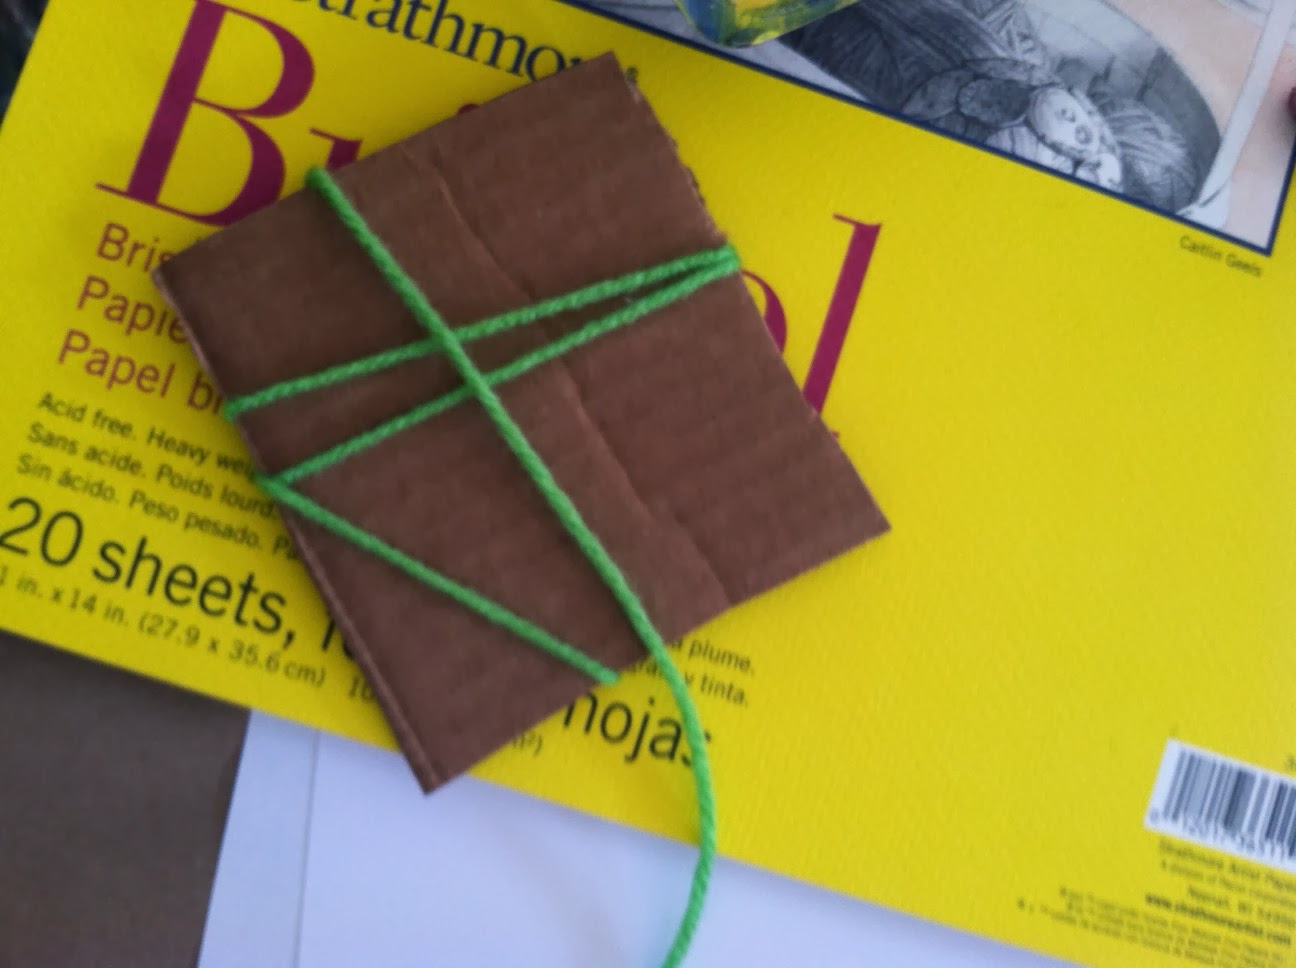
Create the stamp!
Cut a long piece of yarn and tape to one side of the cardboard square. Wrap yarn around square then tape end down.
Step Two:
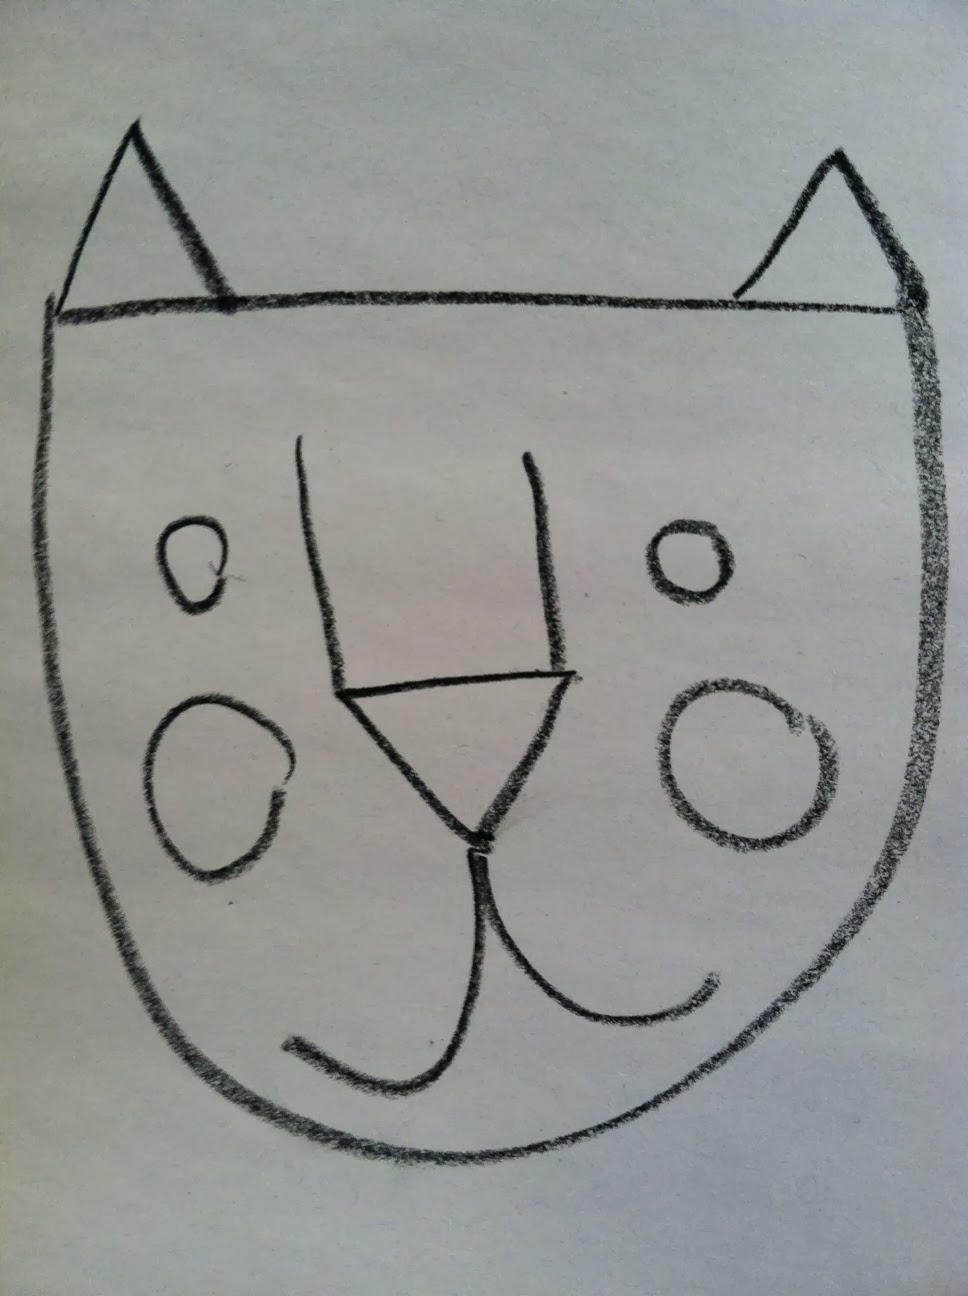
Draw and Color Lion Face!
Practice drawing simple lion face then redraw on Bristol paper. Trace over pencil lines with black oil pastel. Color in face with yellow oil pastel (the black oil pastel will smear into the yellow, this is fine!). Fill in cheeks with pink and nose with black oil pastel.


Step Three:
Create the Mane!
Paint around lion's face with watered down orange acrylic. Wait a few minutes to dry or use hair dyer for faster drying time. Using your stamp, stamp first yellow then brown around lion's face. Glue down scraps of fabric to finish mane!


