Thursday, November 21, 2013

Children's Book Festival 2013


Each November the City of Savannah and Live Oaks Public Libraries presents Savannah Children's Book Festival. It is a WONDERFUL event full of fantastic authors, illustrators, and other activities designed for children. We have had the pleasure of participating the last three years!


A few of this year's featured authors and illustrators were:


*Nick Bruel, "Bad Kitty" & "Bad Kitty School Daze"


*Marc Brown, "Arthur's Teacher Trouble" & "Arthur's Nose"


*Rachel Renee Russell, "Dork Diaries"


Tad Hills, "How Rocket Learned to Read" & "Duck and Goose"


Each Spring the library holds a poster contest with a new theme for the upcoming festival. Like many art teachers I love a good contest! Our talented students have created some truly great pieces and consistently earn awards! Here are some past entries along with tips for what makes a successful illustration at any age!


*Brainstorm! Start by coming up with at least out 4-5 ideas or concepts. Your first idea is rarely the best and it's a good way to work on problem solving skills.


*Thumbnails! Always use thumbnails. Thumbnails are simplistic mini sketches that shouldn't take more than a minute or two. Thumbnail sketches allow you to quickly work out a few options without getting too detailed.


*Composition! Kids tend to make their drawing small to medium sized and in the middle of the page. An illustration can be totally transformed by enlarging the image or changing the symmetry.


*Execution! When executing artwork consider age, materials, and size. Materials like pastels and acrylic paint do not work well with small scaled works. Watered down acrylics and Sharpie pen are a good way to preserve a beautiful drawing, especially for young artists. Colored pencils can look thin unless layered. Use colored or toned paper to punch up a colored pencil piece.


Tuesday, November 12, 2013

Bunny Portraits!!


I'm a sucker for Animal Portraits of any kind! It had been a while since we'd done them at the studio, so this week we painted Bunny Portraits. I did these with my 4-6 year olds, but would work for slightly older ages as well!


Materials:


Bunny Sample Drawing
Practice Paper
Pencils
Bristol Paper
Black Crayon
Brown, Cream, Red, and Black Acrylic Paint
Paint Brushes
Glue
Scissors
Scrap fabric or other embellishments


Step One:

Bunny Practice Drawing!
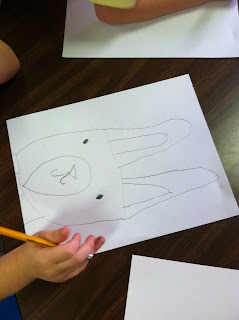
I started out by explaining that placement is very important while drawing bunnies since it's necessary to leave room for the ears. With this in mind we drew a large U shape on our page, leaving room at the top. Next we closed in the U shape and added long ears, then the face and neck.


Step Two:

Time to Paint!
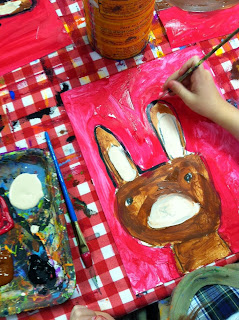
Once we finished our practice drawings, we redrew our Bunnies on Bristol paper and outlined with black crayon. Next we painted the outside of the ears, face, and neck with brown paint. The inside of the ears and circle with nose and mouth are painted with a cream color and background with red. *Outlining the bunny head with paint, then filling in the background is a good way to avoid having little ones paint on their bunnies!


Step Three:

Outline!
Lastly, we took a small brush and outlined our bunnies and their faces with black paint. Add any embellishments or fabric to finish the portraits!!